Personalization at scale starts with a great template.
With LettrLabs, you can easily design and launch handwritten cards, postcards, and flyers—each customized to your brand and audience.
Here’s a quick step-by-step guide to creating your first template:
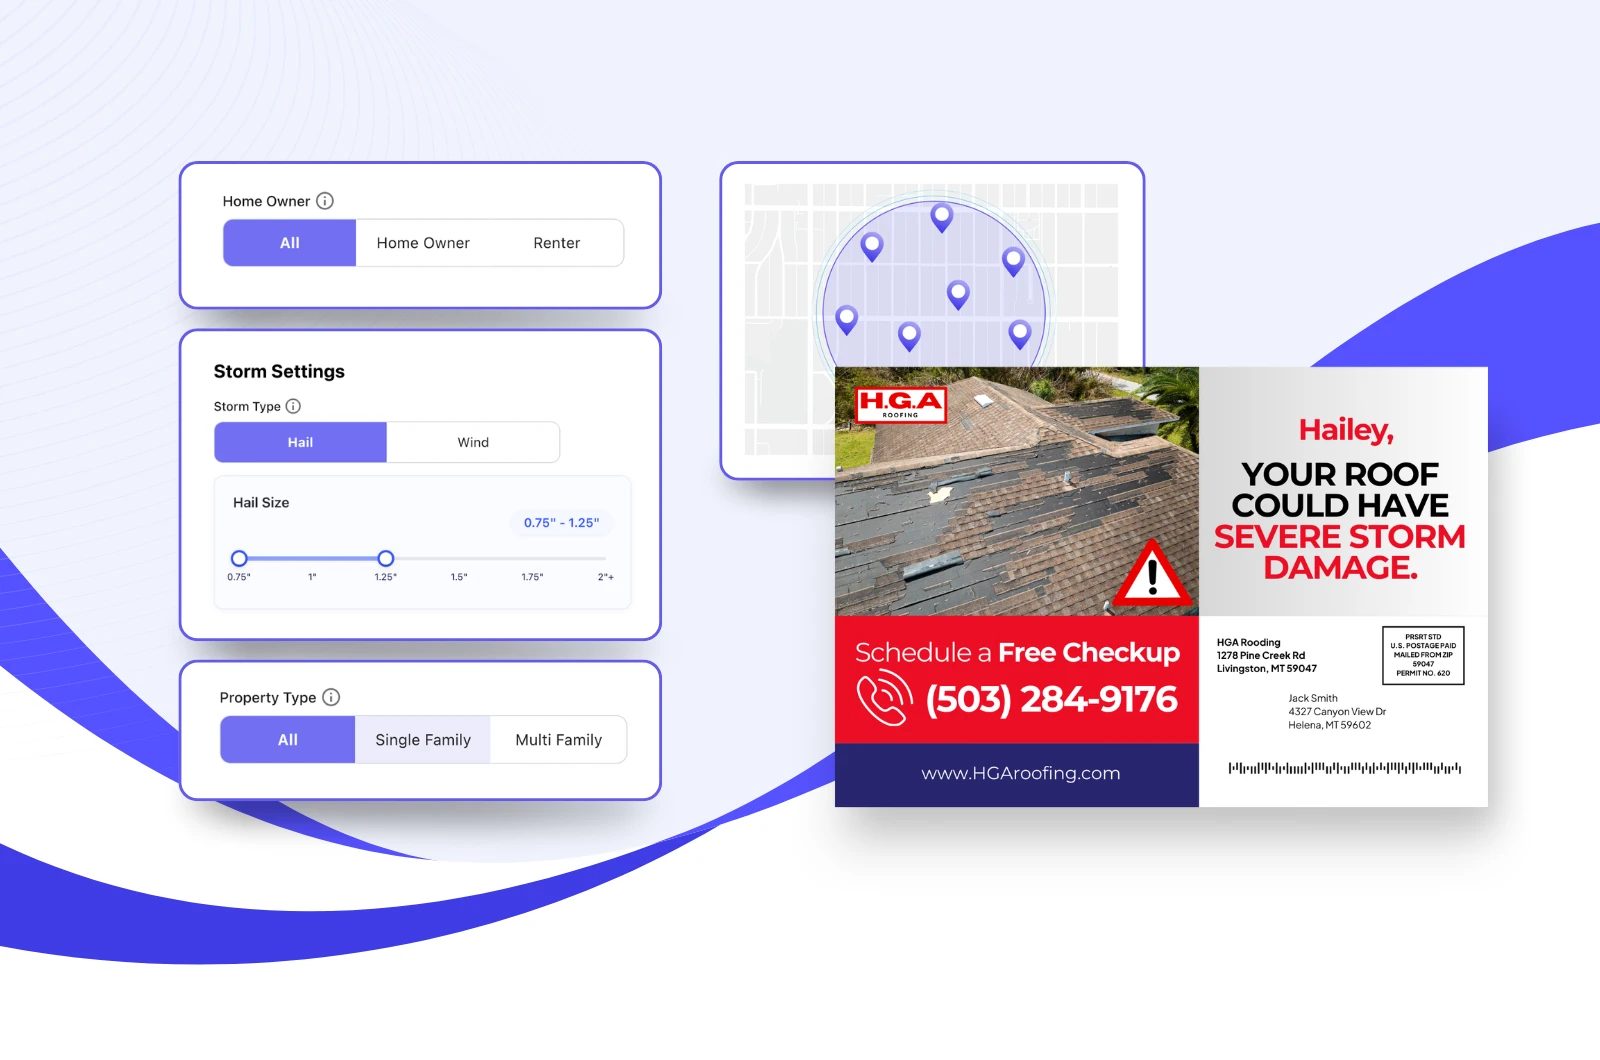
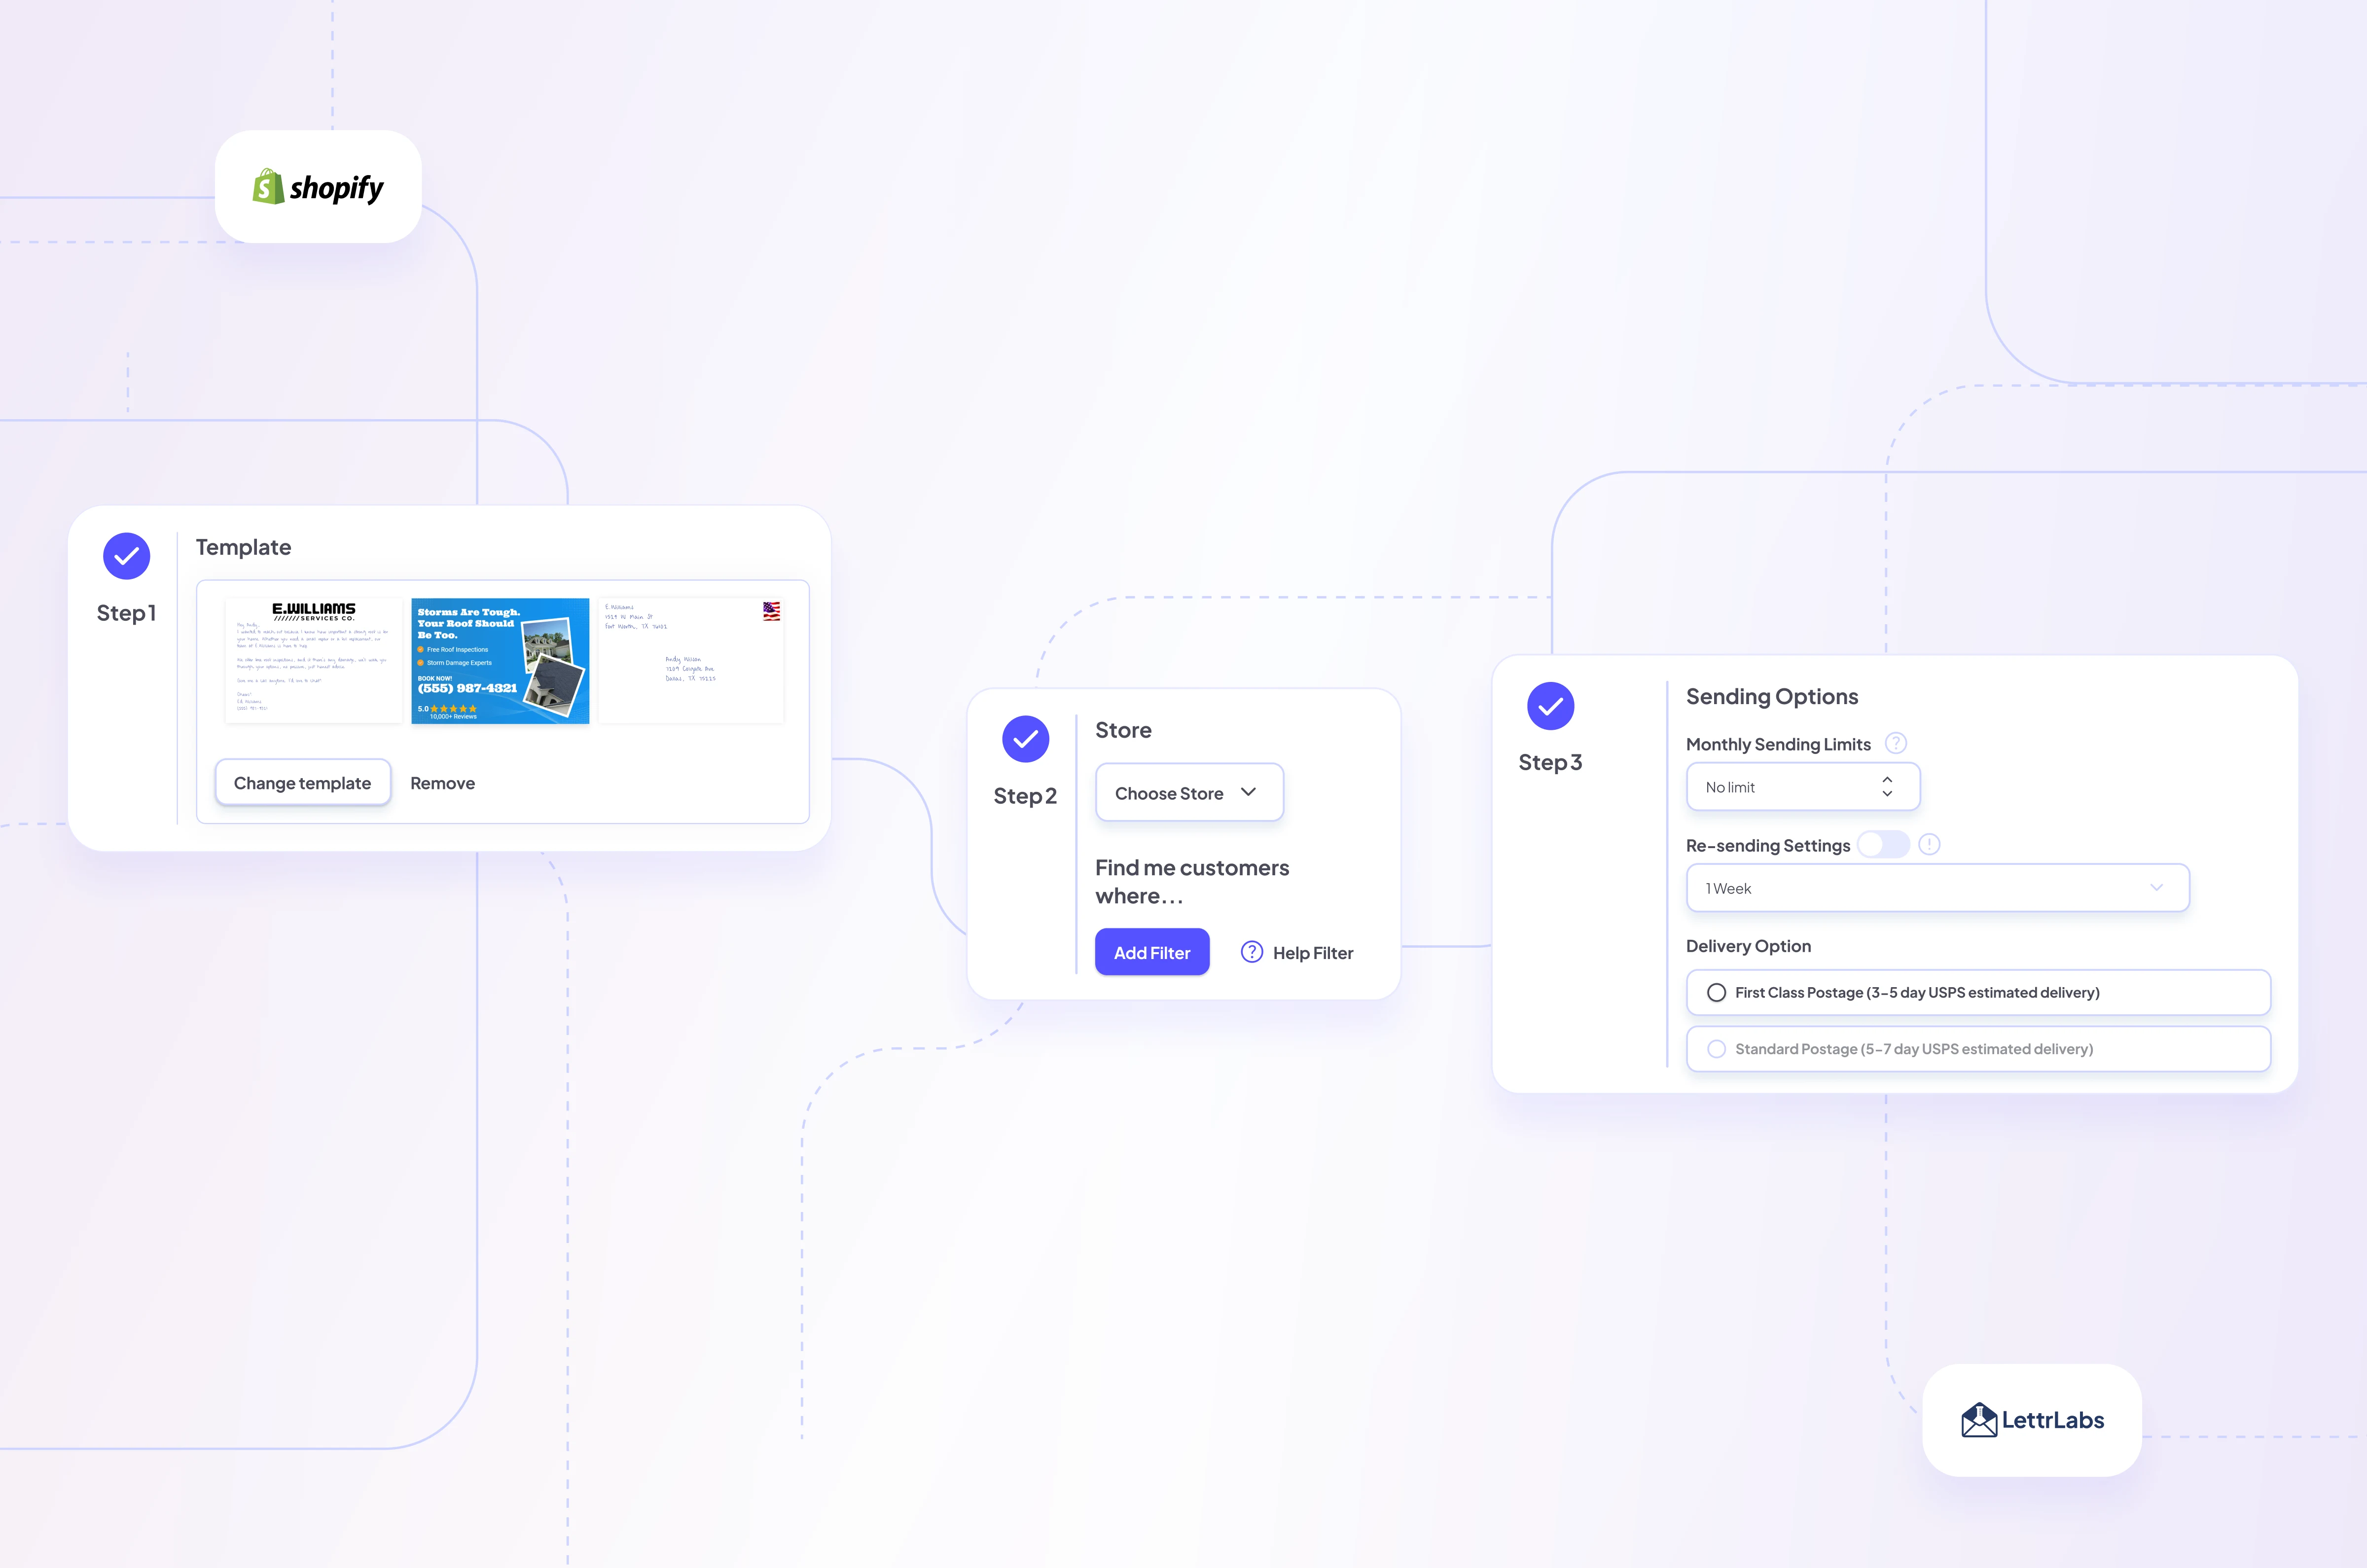
✅ Step 1: Navigate to the Templates Page
From your LettrLabs homepage:
- Click the “Orders” tab on the left
- Select “Templates”
- Choose an existing template or click “New Template” to start from scratch
- Give your template a clear, searchable name (e.g., VIP Welcome, Abandoned Cart Winback)

✉️ Step 2: Choose a Product
You’ll be taken to the Products page, where you can choose from several format options:
- Flat cards (our most popular option)
- Folded cards
- Postcards (including handwritten options)
- Flyer + Handwritten Envelope combo

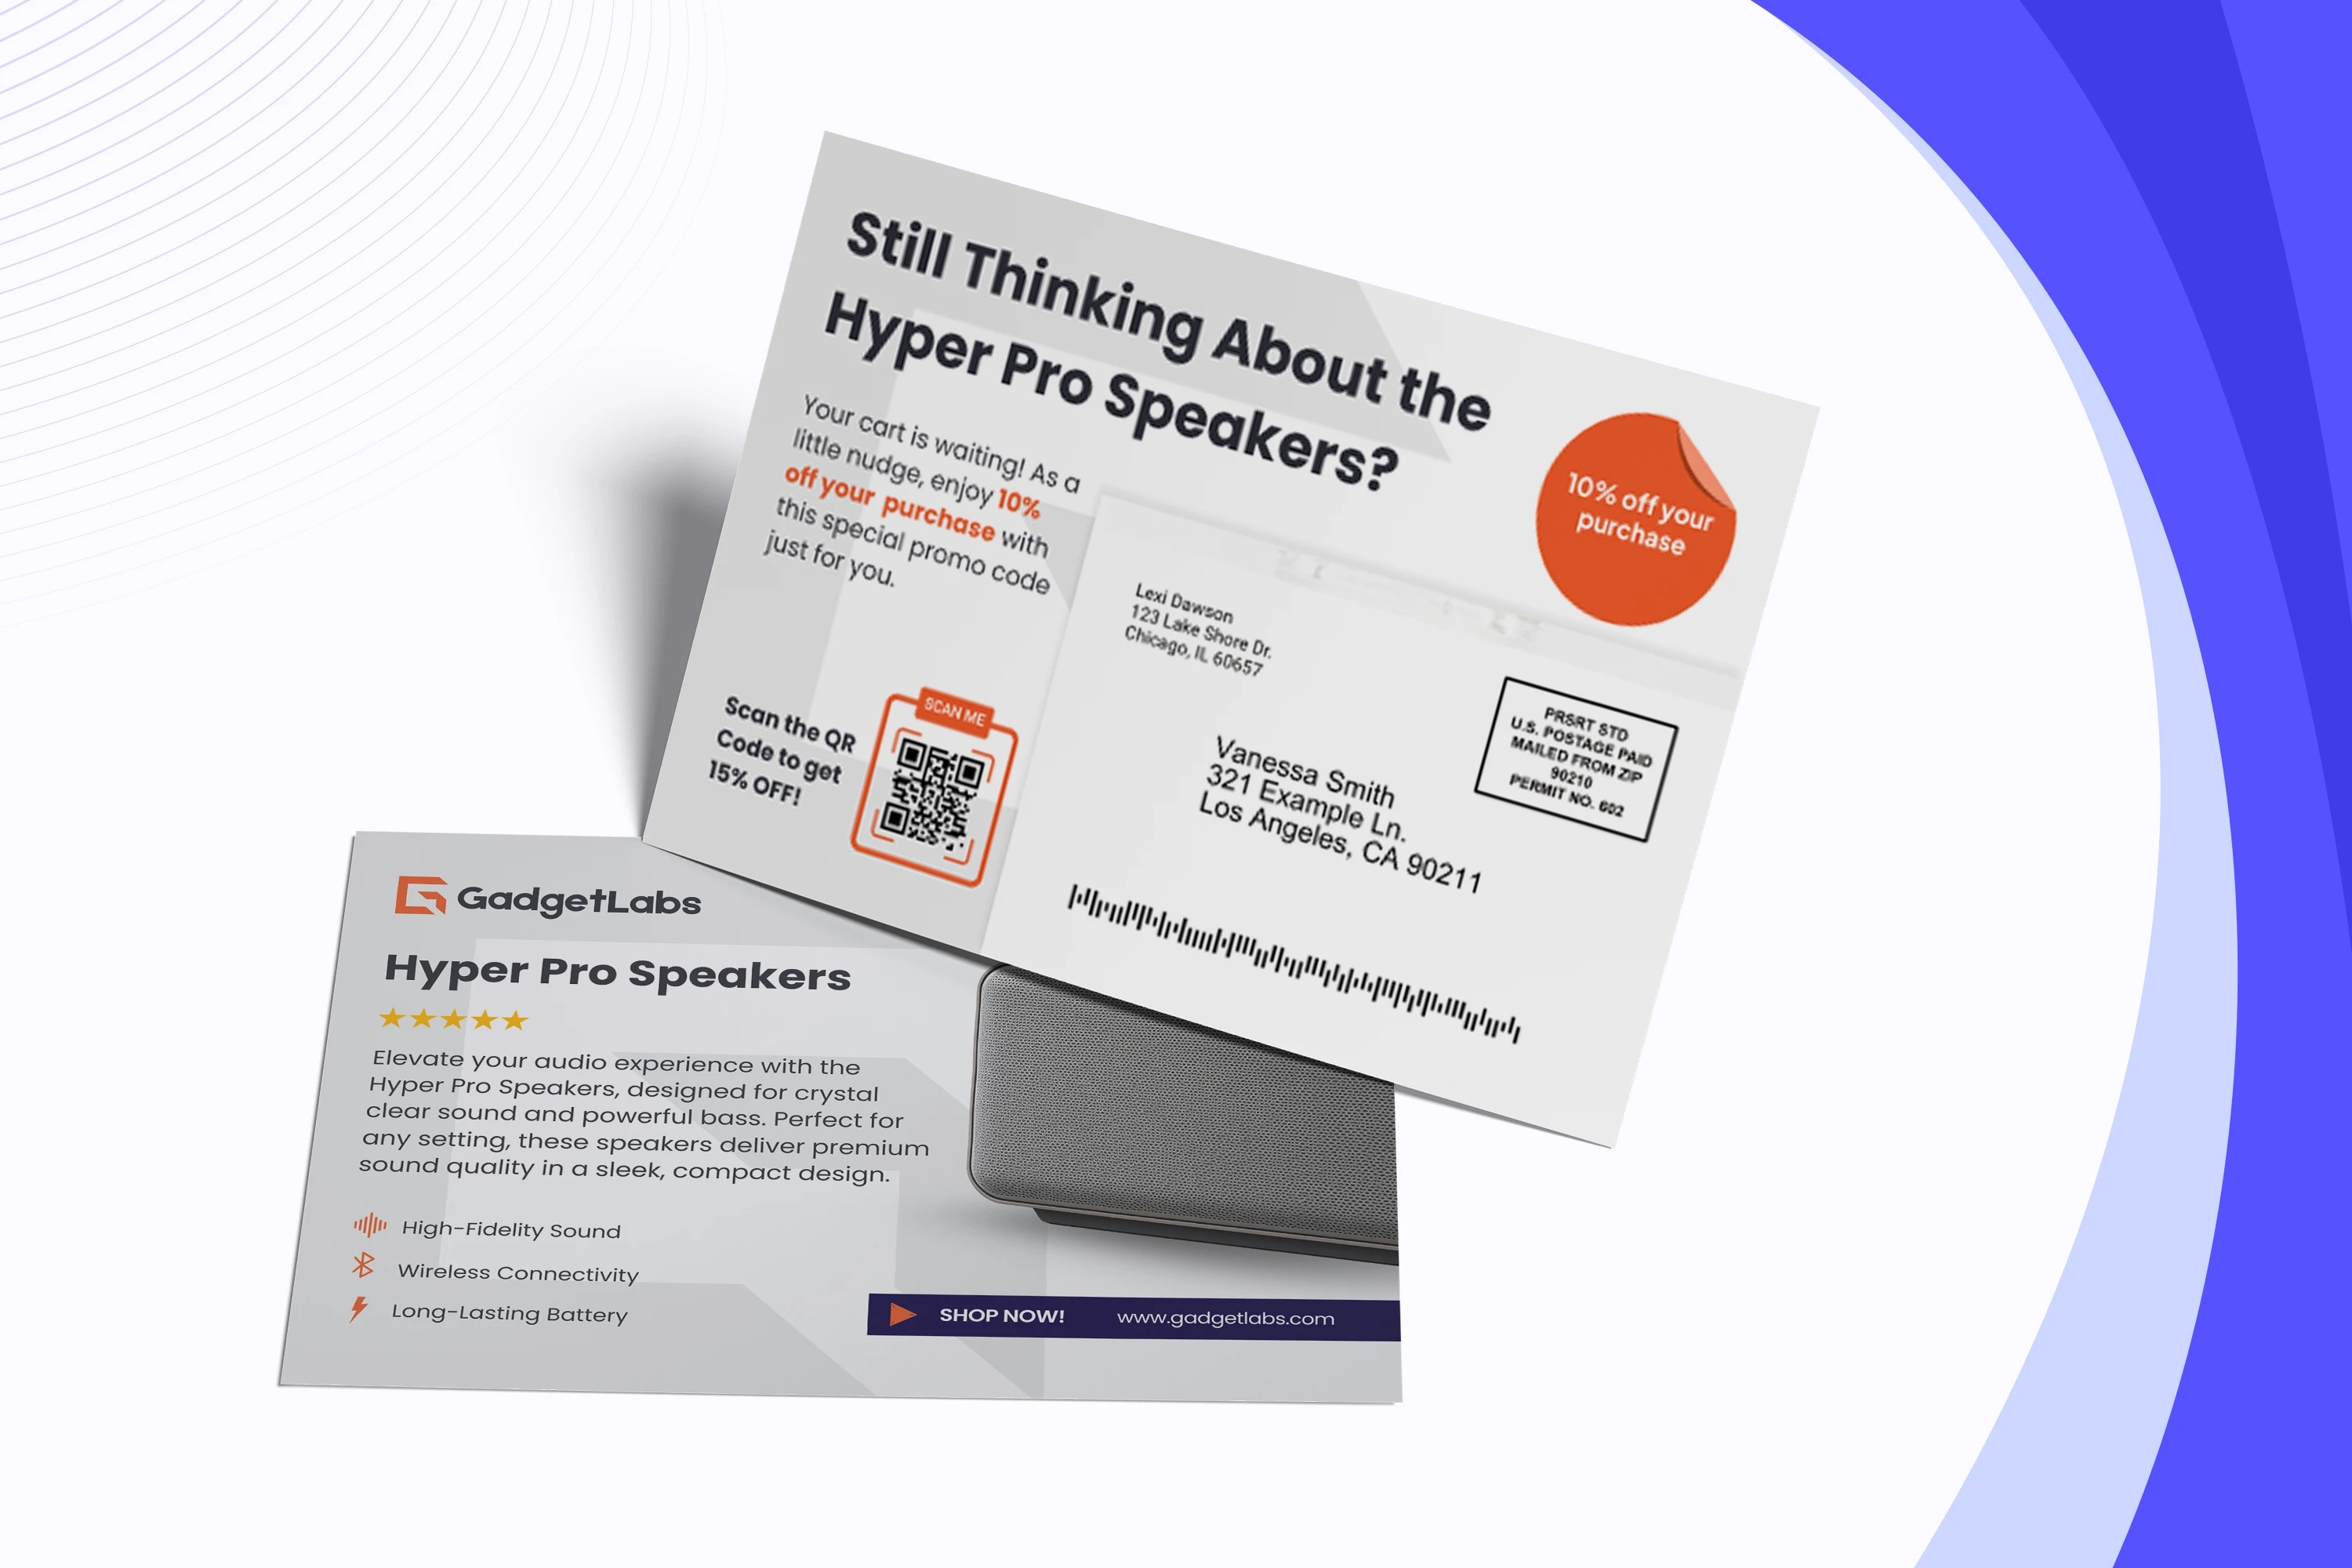
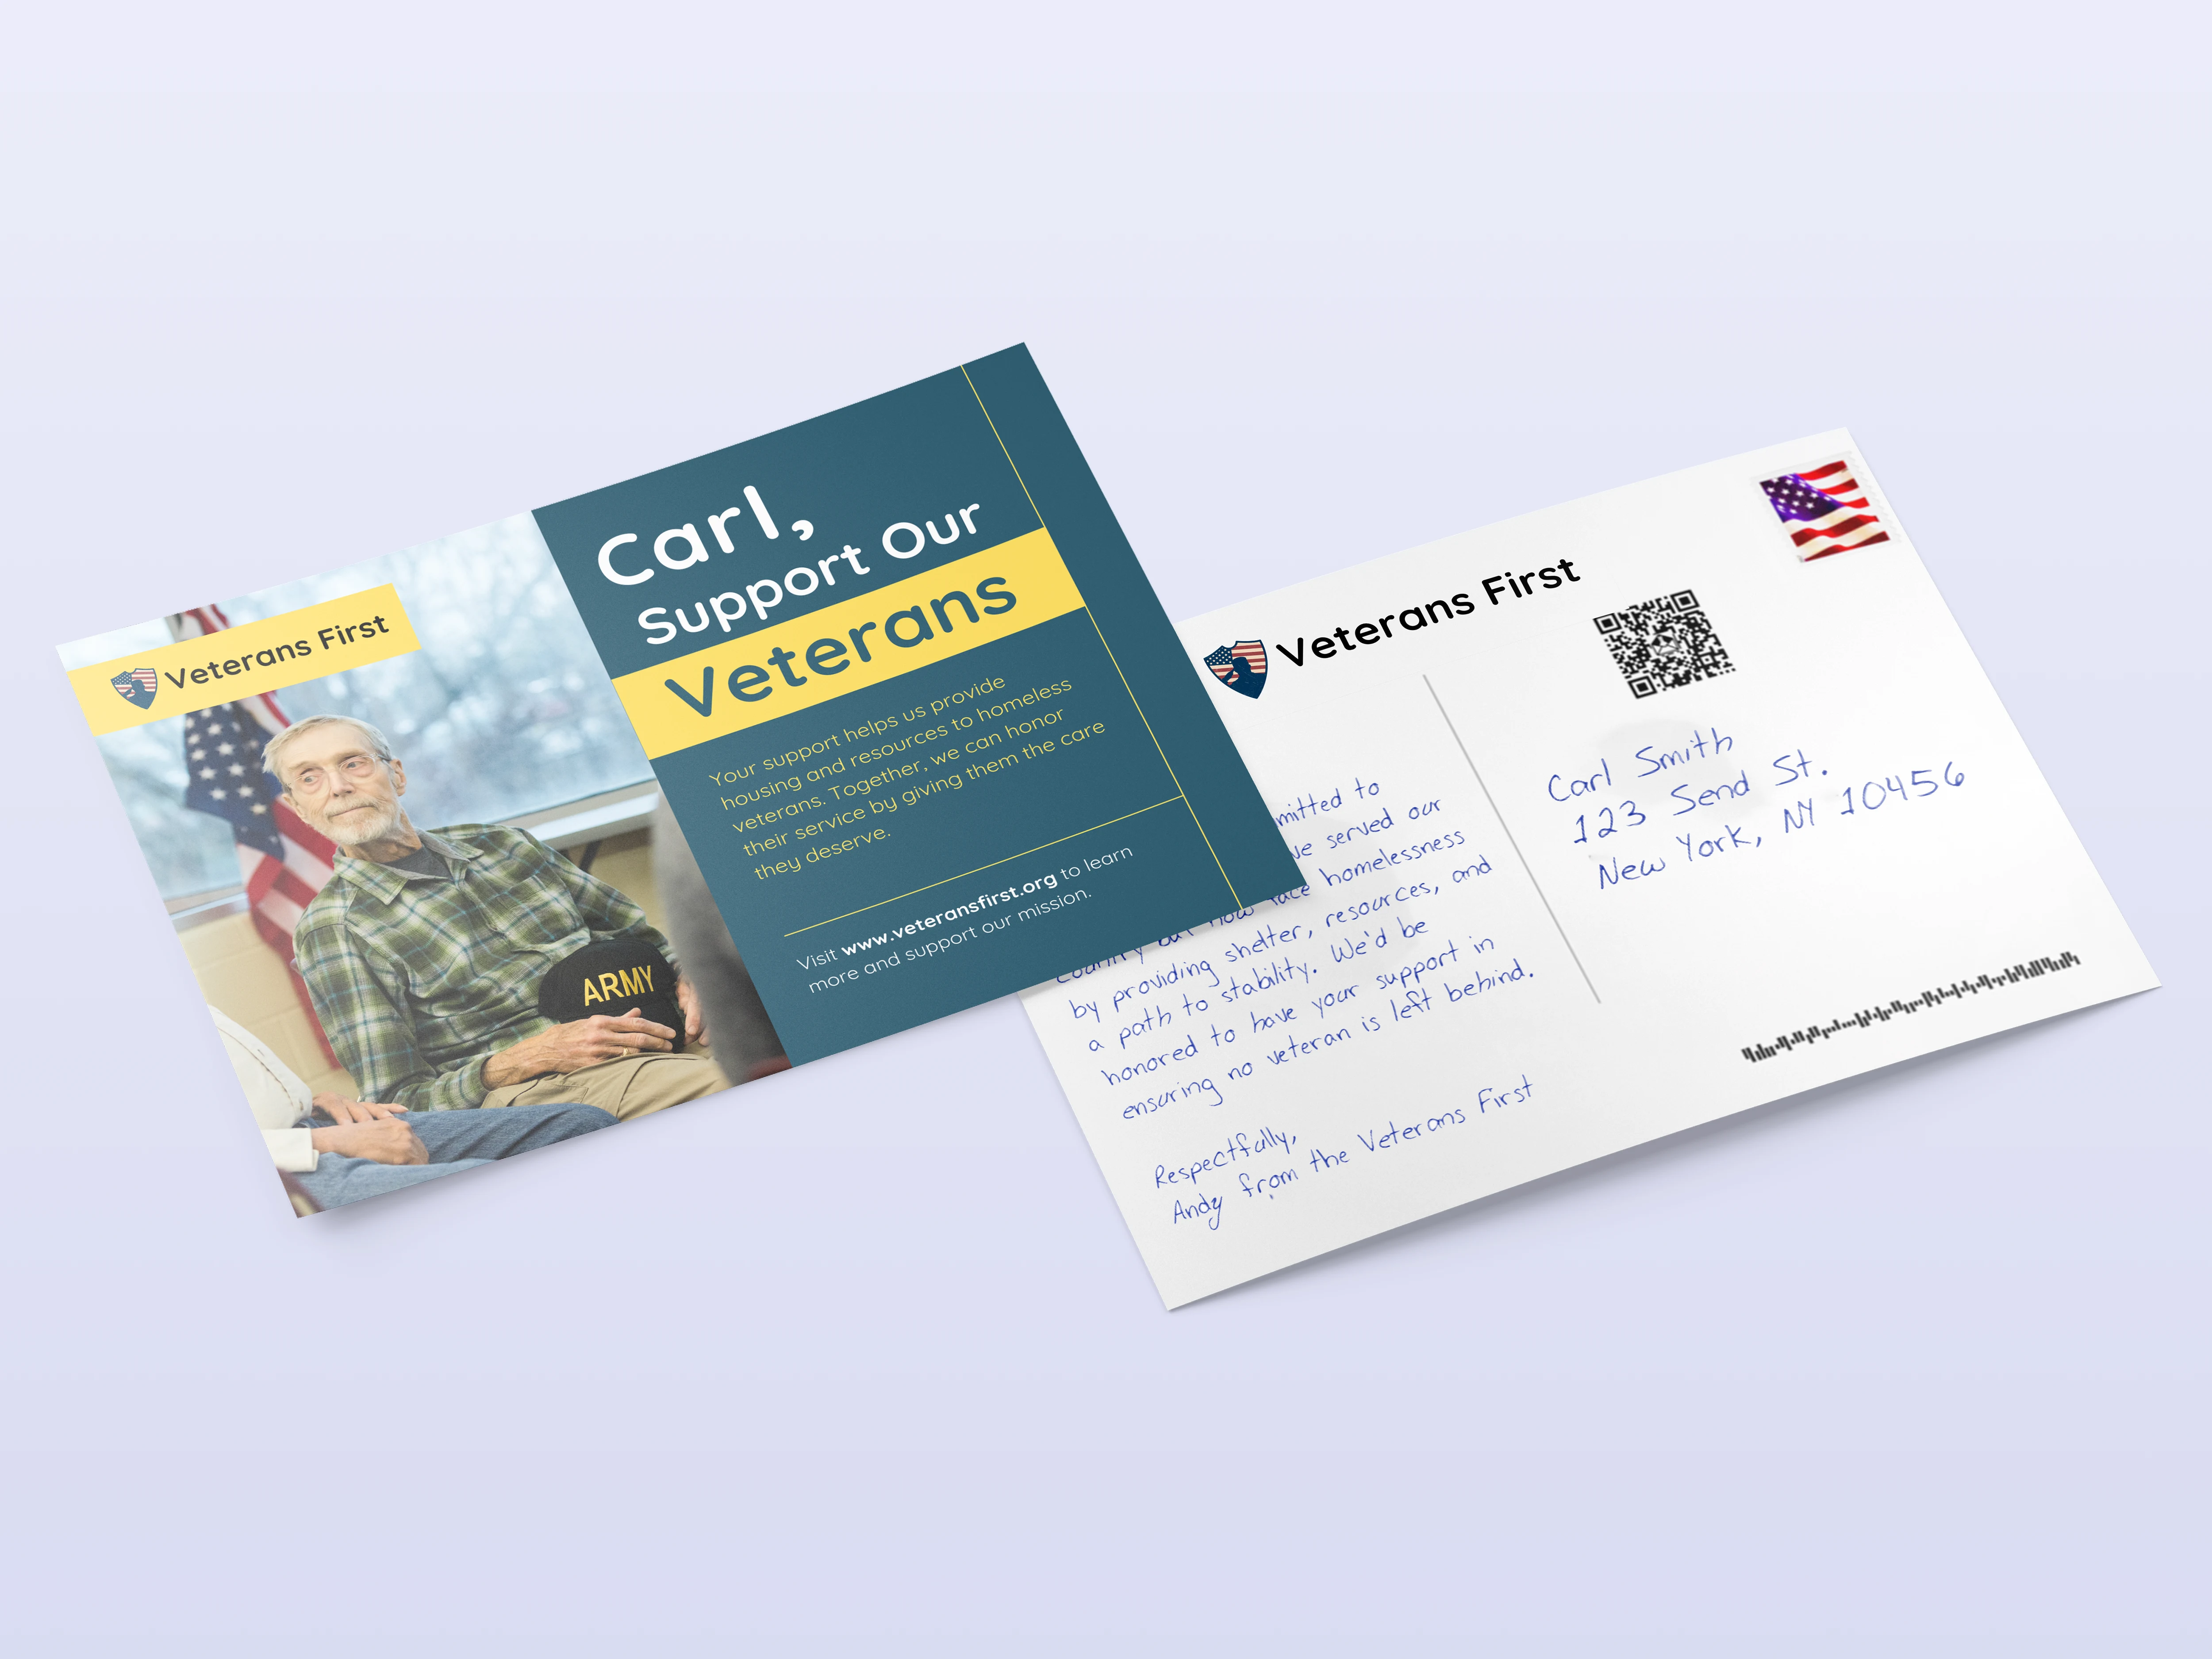
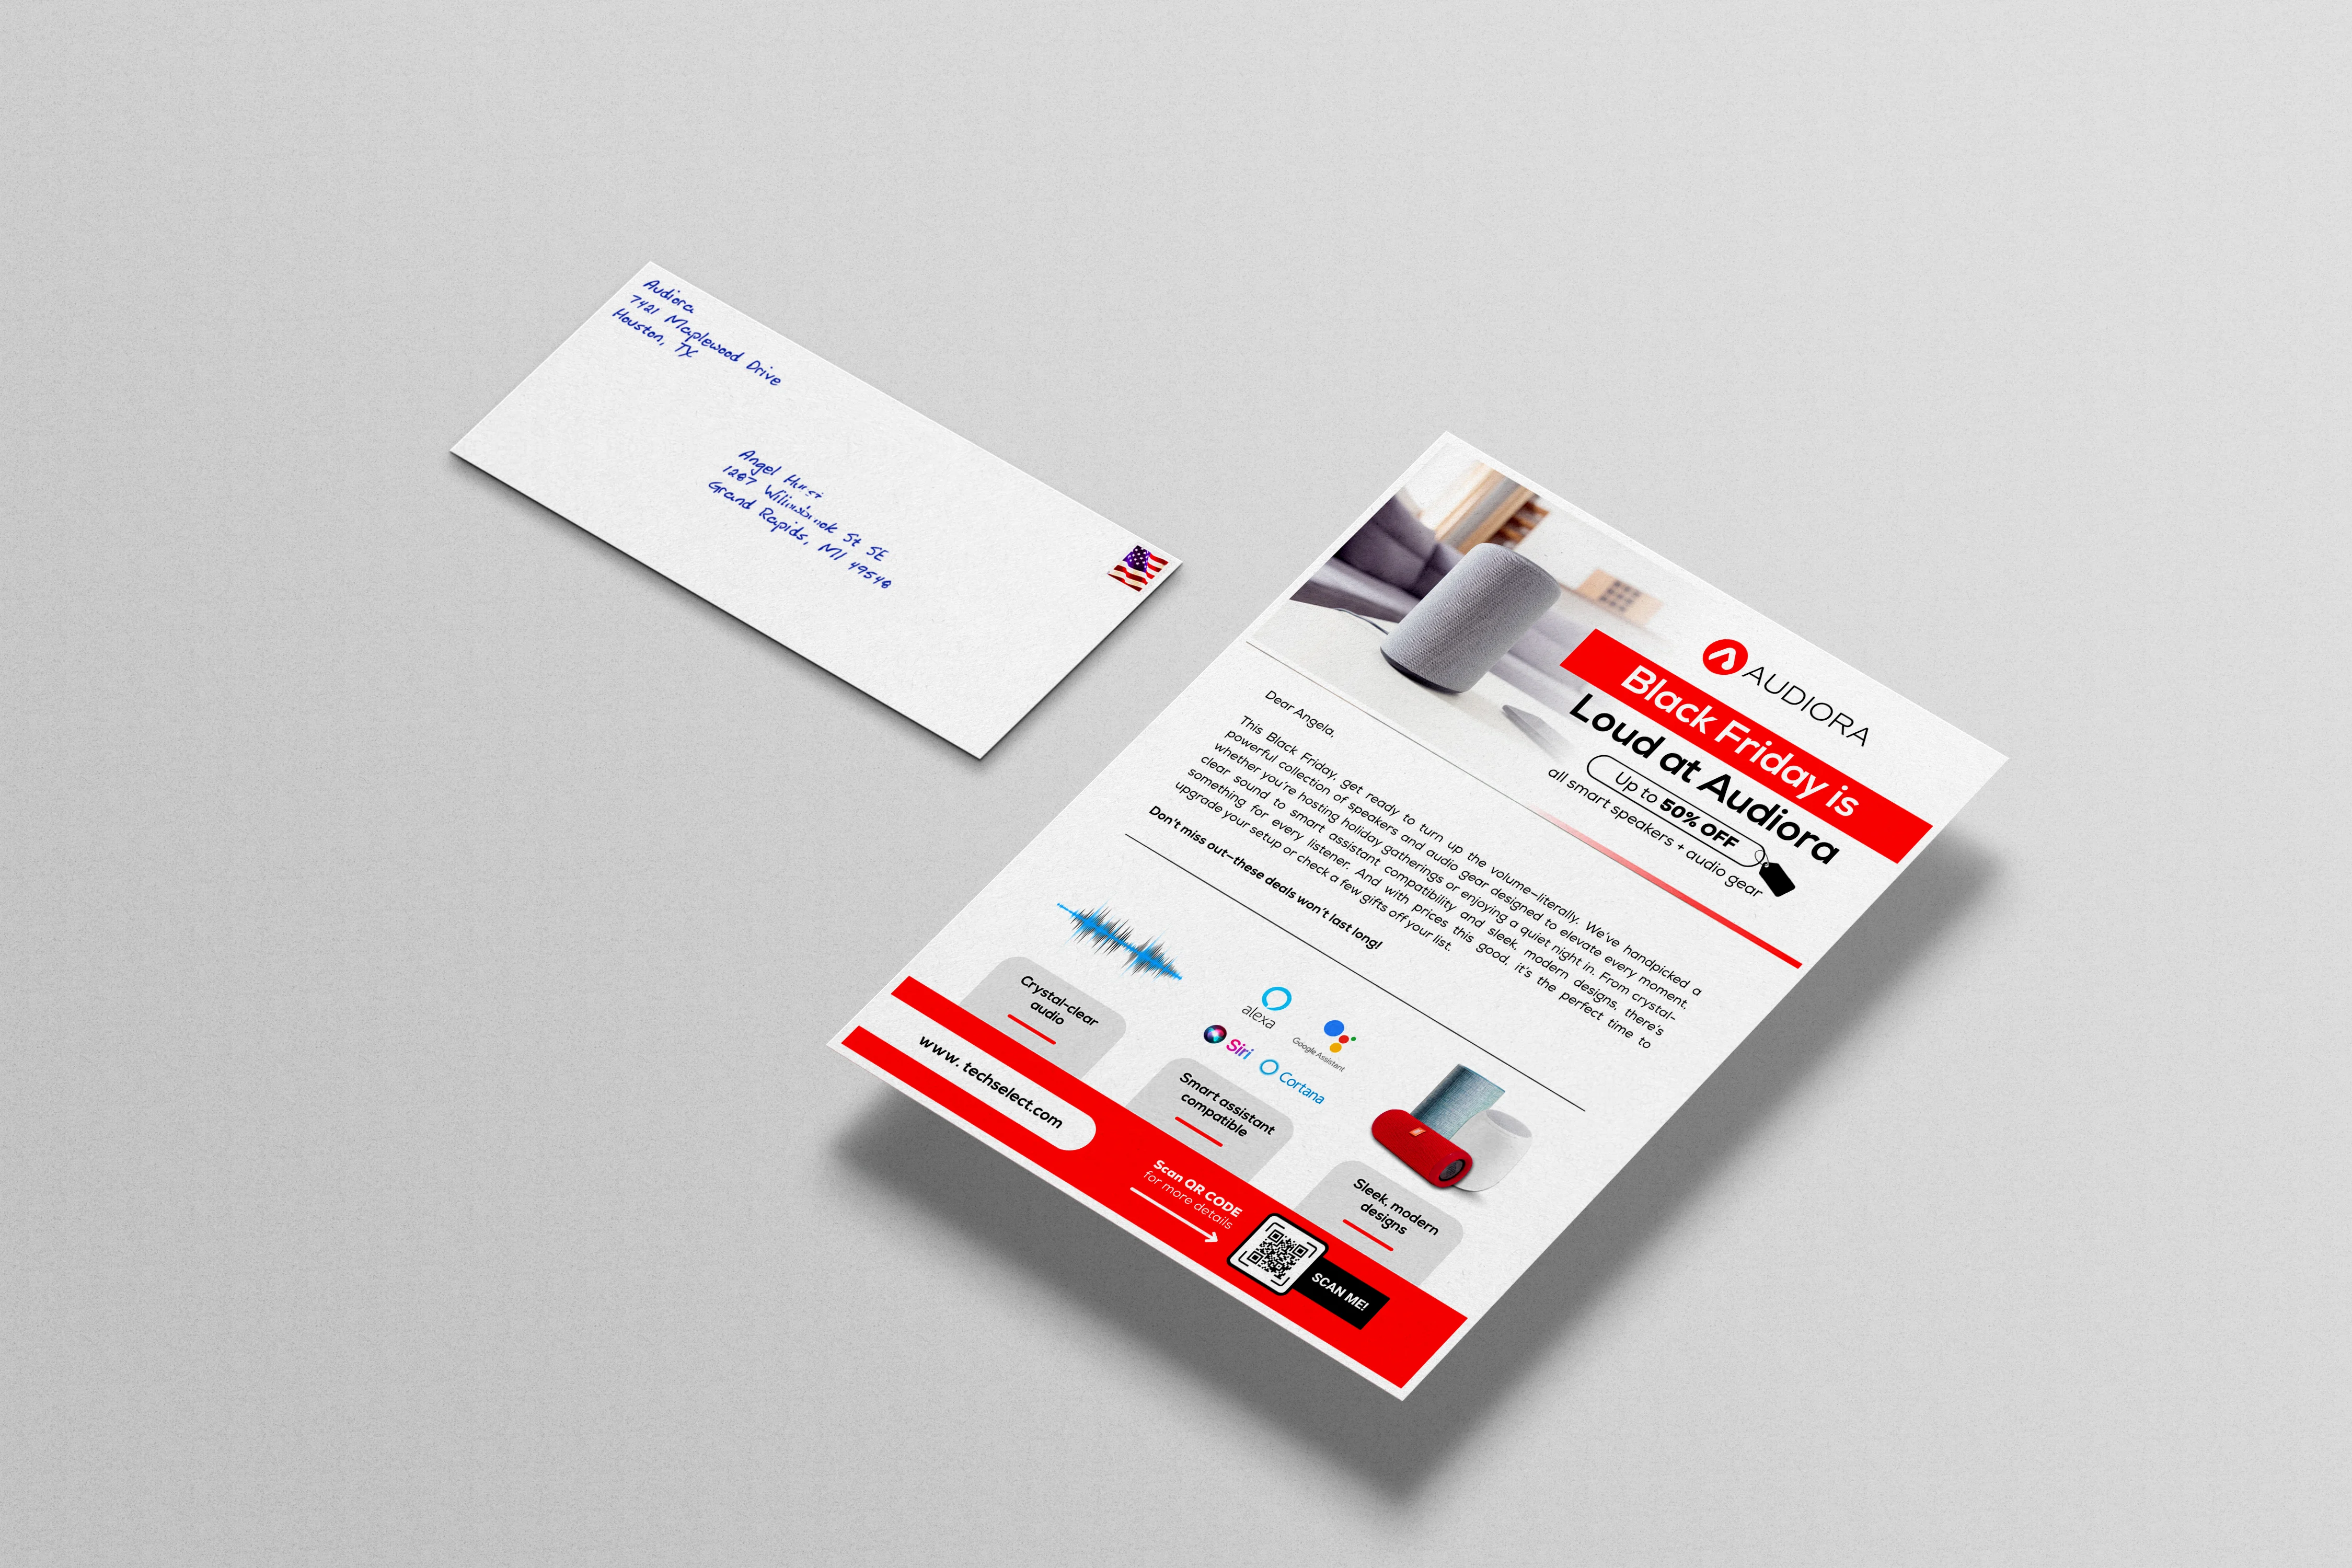
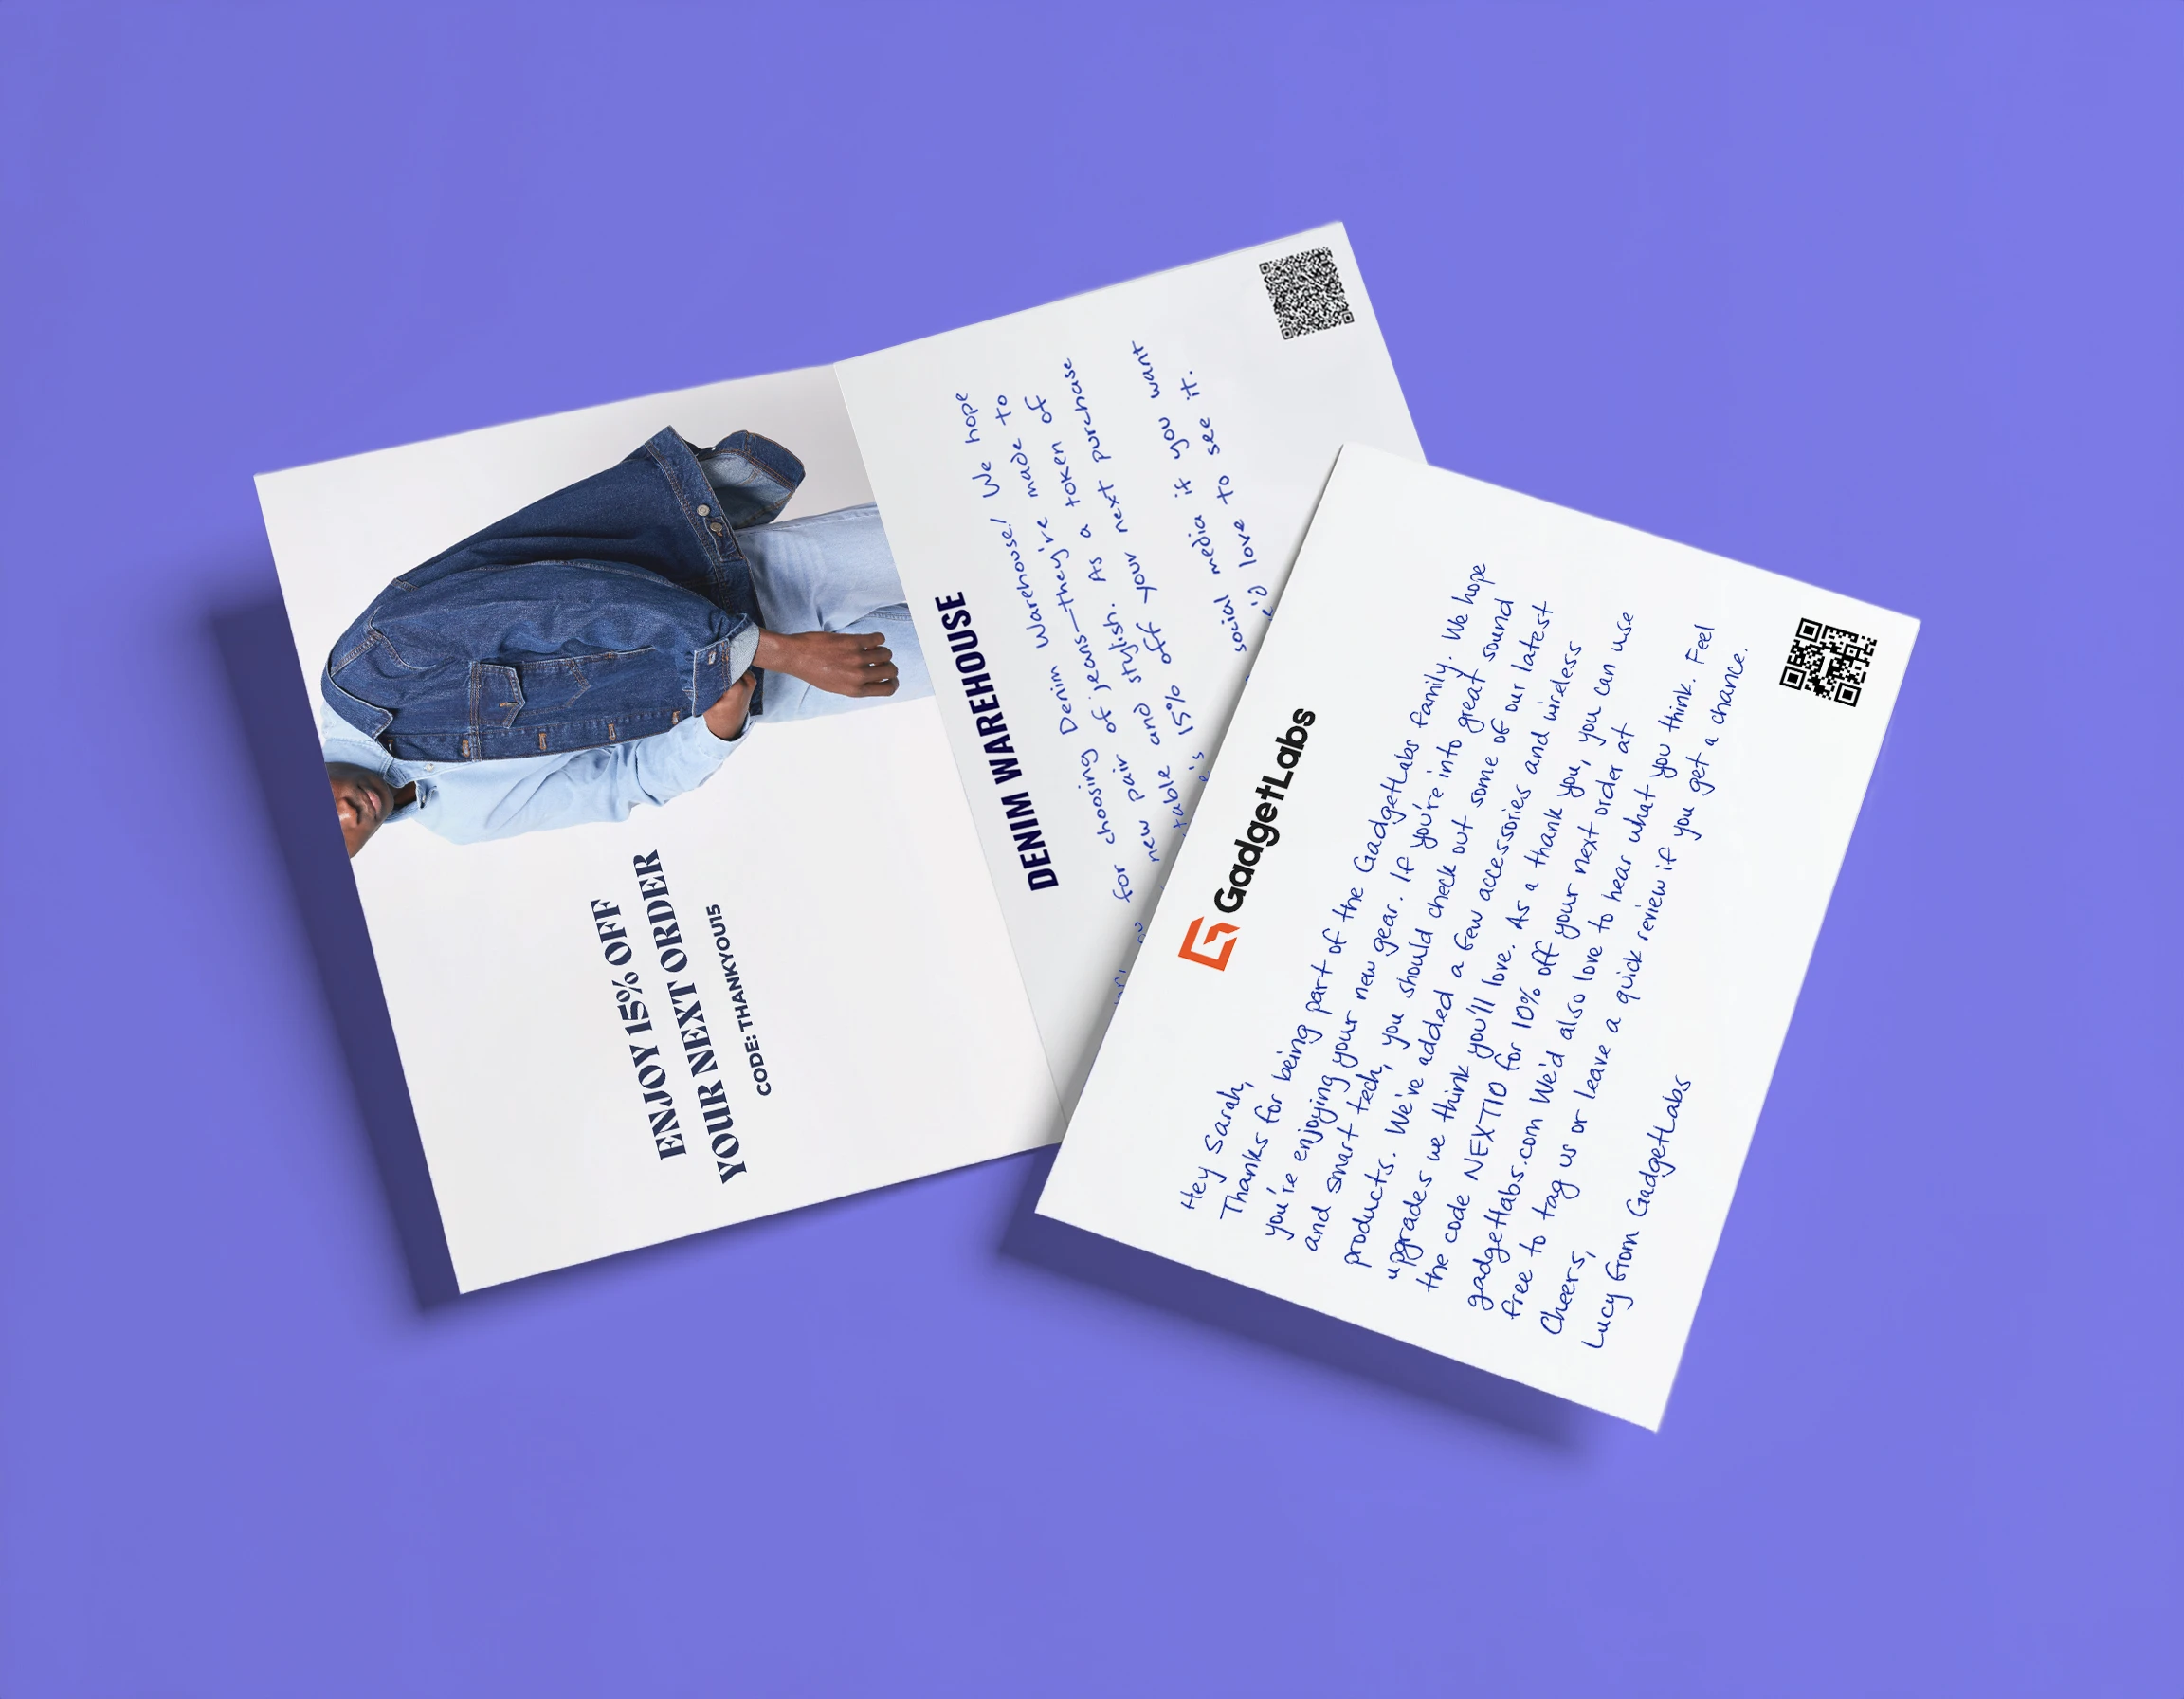
For this walkthrough, we’ll use the Handwritten Flat Card + Envelope.
📝 Step 3: Compose Your Handwritten Message
In the editor:
- Type your message directly into the template
- What you type is exactly what will be handwritten by our robotics
- Preview the handwriting live as you type
Want to change the look?
- Choose from 60+ handwriting fonts
- Adjust font size for the perfect balance
- Add emphasis with bold, italics, or spacing
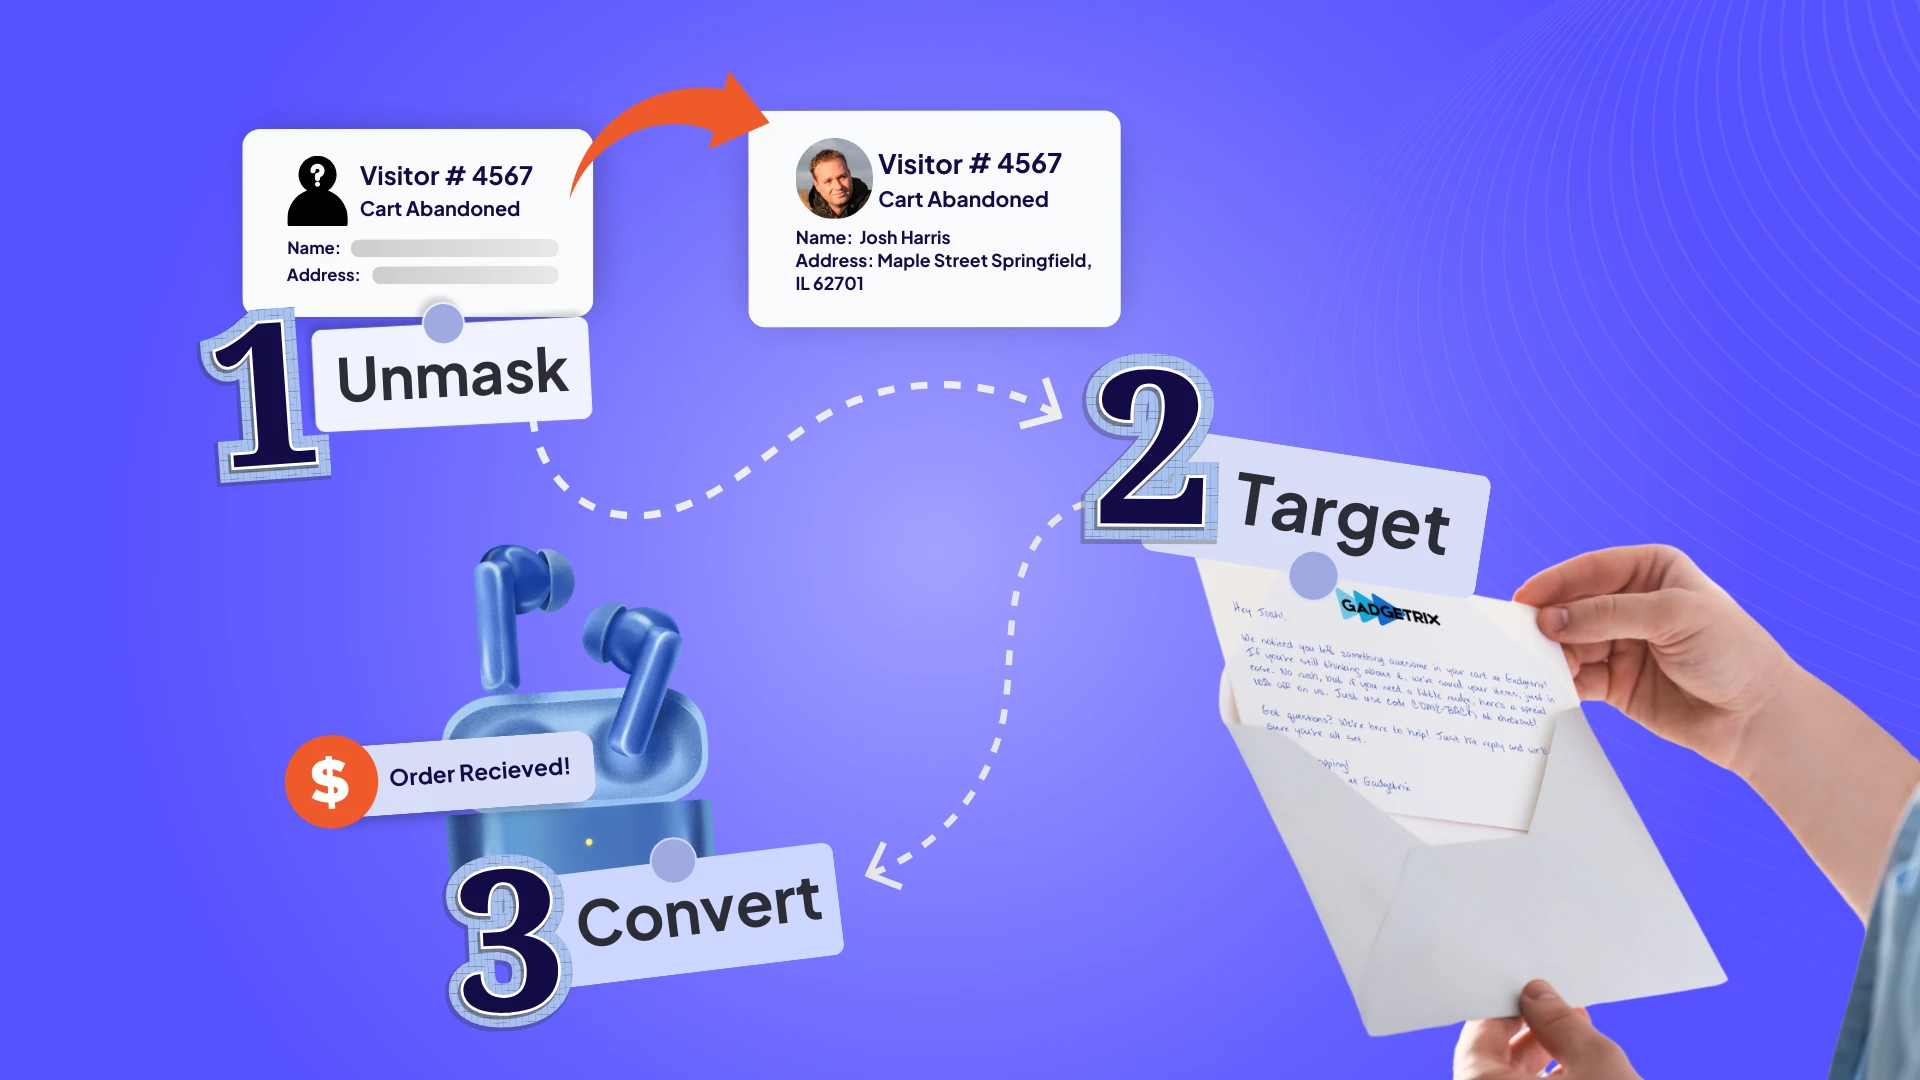
🔗 Step 4: Add Dynamic Mail Merge Fields
Personalization is easy with mail merge:
- Use placeholders like
[[first name]]to insert customer-specific info - You can also map custom fields like
[[last order]],[[referral source]], etc. for deeper personalization
📲 Step 5: Add a QR Code (Optional)
Want to drive traffic to a specific link?
- Paste any URL (e.g., website, discount page, or custom landing page)
- LettrLabs will automatically generate a QR code and place it on your card
🖼️ Step 6: Upload Logos or Artwork
- Upload your brand logo, product image, or any custom graphic
- Add printed text alongside the handwritten message (e.g., promo codes, disclaimers, hashtags)
- For the back of the card, upload a pre-designed image or use our Canva integration
✉️ Step 7: Customize Your Envelope
- Add your return address, sender name, and zip code
- The system will flag any errors to ensure accuracy before saving
💾 Step 8: Save and Approve
- Click “Save Draft”
- Review your template
- Once approved, it will appear on your home screen—ready to use in campaigns or automations
🎉 That’s It!
You’ve just created a personalized, handwritten mail template—ready to scale meaningful connections with your audience.
Need help designing your next card or setting up a campaign? Reach out to our team—we’re here to help!


.webp)
.webp)


.png)